Sending Transaction Email in Bulk
Sending transaction email in bulk is useful if, for example, you want to send reminder email for multiple transactions for which payments haven't been received. You enter search criteria to generate a list of transactions and then select which transactions you want to send email for.
To send transaction email in bulk:
-
Go to Lists > Mass Update > Mass Updates.
-
Click Transactions to expand the mass update options.
-
Click Bulk Email.
The Mass Update page opens.
-
On the Criteria subtab, define the transactions you want to send email for using the Filter dropdown list. For example, you can create a list of all unpaid invoices by doing the following:
-
Select Type in the Filter column.
-
In the popup window, select Invoice, and click Set.
-
In the next row, select Status in the Filter column.
-
In the popup window, select Invoice:Open, and click Set.
-
-
On the Recipients subtab, select which email address to use and the order in which the email fields are searched.
For example, in the screenshot below NetSuite first searches for an email address in the transaction record. If it doesn't find one, it checks the customer record. If there's still no email address, it uses the address in the contact record.
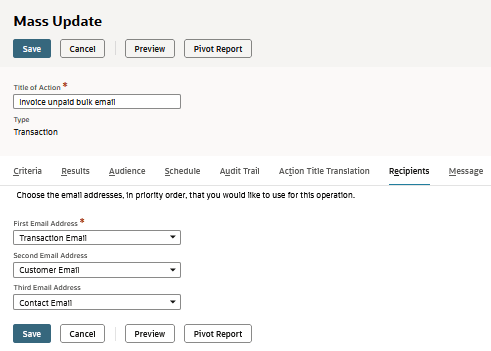
Transaction Email is the email field that appears on the Communication subtab of a transaction such as a sales order.
Customer Email is the email field on the main Customer record page.
Contact Email is the email address related to the named contact within the company.
-
On the Message subtab of the Mass Update form, select the scriptable template you want to use or enter the text for the message in the Message field. Templates can be up to 4 MB in size.
Tip:You can generate bulk transaction email from scriptable templates. Scriptable templates use a combination of HTML and FreeMarker code. For more information, see Scriptable Templates.
-
Do one of the following:
-
Click Preview to view a list of transactions that match your search criteria.
-
Click Save to save this mass update to use later.
When you click Preview, the Mass Update Preview Results page opens with a list of the transactions that match your criteria.
-
-
In the Apply column check the transactions for which to send email.
-
Click Perform Update.
A status page opens that displays progress and completion information.
You can create a simple saved search to check what email has been sent to a particular entity. For more information, see Creating a Sent Log for Transaction Email.