22 Configuring Human Workflow Service Components and Engines
-
Configuring the Notification Service to Send Notifications to a Test Address
-
Seeding Users_ Groups_ and Application Roles using LDAP Tools
-
Configuring Security Policies for Human Workflow Web Services
For information about installing and using the organizational hierarchy of users and groups known as the demo user community, see Installing the Demo User Community in the Database.
For more information about human workflow tuning and performance properties, see Tuning Performance.
22.1 Configuring Human Workflow Notification Properties
You can configure human workflow notification properties, such as setting the notification mode for messages and setting actionable addresses. These properties are used to notify users of changes to the state of a task.
Workflow notifications can use three types of addresses:
-
From address: For sending notifications.
-
Actionable address: For receiving actionable responses.
-
Reply to address: For receiving reply notifications.
Note:
In the following procedures, you must configure your channel drivers before configuring your workflow notification properties. Ensure that you know all necessary driver addresses before beginning (for example, the incoming IMAP and outgoing SMTP email servers).
To configure human workflow notification properties:
-
Access this page using one of the following options:
From the SOA Infrastructure Menu... From the SOA Folder in the Navigator... -
Select SOA Administration > Workflow Properties > Mailer tab.
-
Right-click soa-infra.
-
Select SOA Administration > Workflow Properties > Mailer tab.
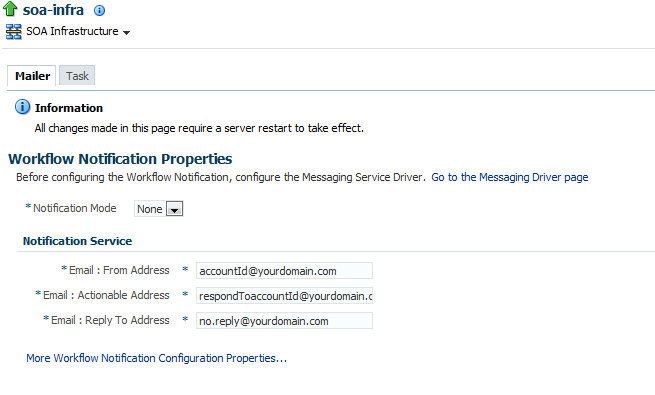
The Workflow Notification Properties page appears.
You now configure Oracle User Messaging Service to send and receive notifications. During configuration, you provide the addresses that are used by human workflow.
-
-
Click Go to the Messaging Driver Page.
The Messaging Drivers page is displayed.
-
Go to the Associated Drivers section.
-
In the Configure Driver column of the Local tab, select the driver to configure. For this example, the User Messaging Email Driver is selected.
This takes you to the Email Driver Properties page for the selected messaging service driver.
-
Click the Create icon.
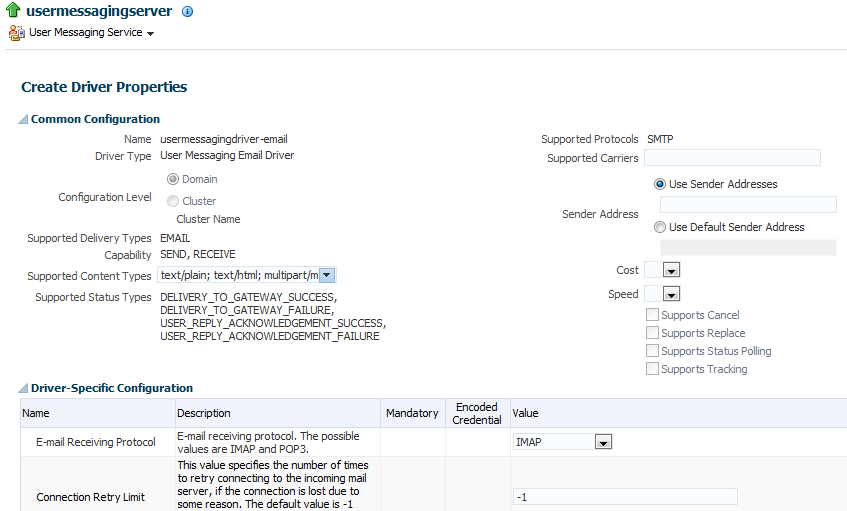
This takes you to the Create Driver Properties page to configure the selected messaging service driver.
-
See the following section based on the messaging service driver you selected in Step 4.
For This Driver... See... Messaging Extension
Section 26.4.1.3, "Configuring the Messaging Extension Driver."
Note: This driver is not selectable from the Local tab, but is available for configuration.
Email
"Configuring the Email Driver" of Administering Oracle User Messaging Service
SMPP
"Configuring the SMPP Driver" of Administering Oracle User Messaging Service
XMPP
"Configuring the XMPP Driver" of Administering Oracle User Messaging Service
VoiceXML
"Configuring the VoiceXML Driver" of Administering Oracle User Messaging Service
Proxy
Section 26.4.1.9, "Configuring the Proxy Driver" of Administering Oracle User Messaging Service
For example, if you selected the email driver, properties such as the following are displayed for you to configure:
-
Incoming IMAP and outgoing SMTP email servers.
-
Outgoing server user names and passwords.
-
List of sender addresses and the default sender address. (The addresses you specify for these properties must match the addresses you specify in the Email: From Address and Email: Actionable Address fields of the Workflow Notification Properties page.)
For handling incorrect email responses, the email driver should be configured to handle incoming mail. This action enables human workflow participants to receive and forward notifications. Messaging drivers support the various messaging transports.
Note:
-
The hostname and IP address of the email server with which you configure must also be added to the
/etc/hostsfile of the server on which Oracle SOA Suite is running. For example, if the hostname isxyz.example.comand the IP address isaa.bb.cc.dd, then add this information to the/etc/hostsfile. -
After you configure the inbound (IMAP) email server, the outbound (SMTP) email server, or both, you must restart the managed Oracle WebLogic Server on which the SOA Infrastructure is configured for these setting to take effect.
-
-
Click Apply when driver configuration is complete.
-
Return to the Workflow Notification Properties page.
-
Specify the mode of the notification service. The values are:
-
ALL: The email, short message service (SMS), instant message (IM), and voice channels are configured and notification is sent through any channel that you use.
-
EMAIL: Only the email channel is configured for sending notification messages.
-
NONE: No channel is configured for sending notification messages. This is the default setting.
-
-
Specify notification channel values:
Field Description Example Email: From Address
Enter the outgoing email address from which end users receive notifications.
The address you specify must match the sender addresses and the default sender address that you specify on the Email Driver Properties page of the Oracle User Messaging Service.
Note: You can only receive error messages when the outgoing email address is also configured to receive incoming messages. This ensures that error messages from incorrect or nonexistent email addresses are captured by the server. Even if you configure a separate incoming account in the Email: Reply To Address field, error messages do not appear in the server logs.
It is best practice to have From Address pointing to outgoing email address in the Email Driver Properties page.
Email: Actionable Address
Enter the incoming email address for performing task actions. The actionable email account is the account in which task action-related emails are received and processed by human workflow.
The address you specify must match the receiver addresses that you specify on the Email Driver Properties page of the Oracle User Messaging Service.
Email: Reply To Address
Enter the address to display in emails sent out from Oracle SOA Suite. It can be a dummy address such as
[email protected]or a valid address. If a valid address is provided, and configured in the Messaging Driver page, then if a user replies to actionable email address, human workflow sends an automated email indicating the correct usage. This is another incoming email account.It is best practice to have this email account set to something other than Actionable email address on the Email Driver Properties page. (If it is set same as Actionable email address then auto reply or any reply to email notifications will be processed by workflow engine and at times will be responded back to as unsolicited email).
-
Click Apply.
-
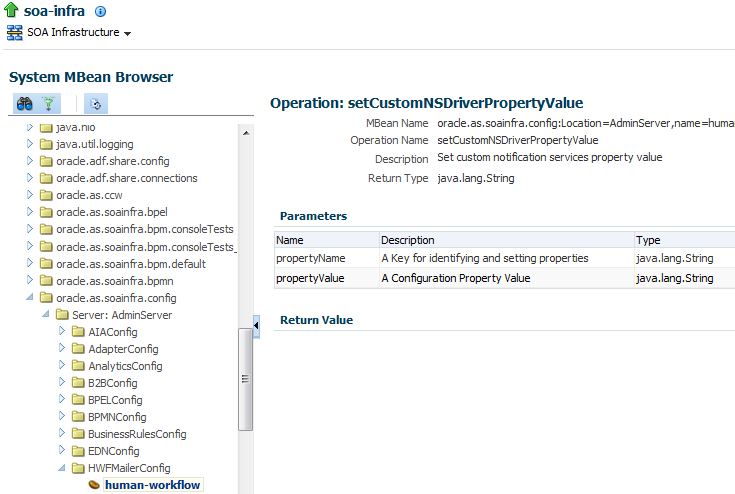
To configure advanced notification properties in the System MBean Browser, click More Workflow Notification Configuration Properties. Properties that are displayed include, but are not limited to, the following. Descriptions are provided for each property.
-
ASNSDriverIMAddress: The address at which to receive incoming instant messages (IMs).
-
CustomNSDriverPropertyNames: Returns custom notification services property names.
-
FaxCoverPageCount: The return number of configured fax cover pages.
-
RetryNotificationMessageThrottle: The number of email notification messages that can be processed during notification retry cycles. For more information, see Configuring the Number of Email Notification Messages.
-
-
Make changes appropriate to your environment.
Note:
If your IM message contains content that appears to be actionable, then acting upon the task from within the message does not cause any action to be taken. For example, acting upon the task in the following IM message does not cause any action to occur.
Help desk request for wfaulk  Task Help desk request for  wfaulk
requires your attention.  NOTE: You can act on the task by
copy-pasting one of following  lines as your response.

RESOLVED : [[NID]] :
Pt12uRUu9H+Xem4NYS2o7dKDtqNLs42d4YIs8ySO8Gn0ZVYFsb1SQVenRukRE+
IcE7c4XDb+tPazvP v9T2iA0qylDg0bTaVxX13HhsrCYAg= : [[NID]]
UNRESOLVED : [[NID]] :
xT9l06rbaGRAey+BtgQyJIXk62mkFtCe7ocKxwNLIsPzyE5/7AnGwXlBodEgQxr6
jorvsw2F54k/C1 r5mvyAJpAp4I4IekOHi4qhQ3eSbBHdzET1IL4F3qV/KZ/BAUsq :
[[NID]]
For information about managing incoming and outgoing notifications through email in human workflow, including testing that outgoing messages are arriving at the correct destination, see Managing Outgoing Notifications and Incoming Email Notifications.
For more information about notifications and the User Messaging Service, see the following documentation:
22.2 Configuring the Notification Service to Send Notifications to a Test Address
You can configure the Oracle Human Workflow Notification Service to send all notifications to a test address instead of to a production address.
Use the System MBean Browser in Oracle Enterprise Manager to configure.
To configure the Notification Service to send notifications to a test address:
-
Navigate to the System MBean Browser in Oracle Enterprise Manager. From the SOA Infrastructure Menu select Administration > System MBean Browser. Or
From the SOA Folder in the Navigator, right-click soa-infra, Select Administration > System MBean Browser.
-
Search for the HWFMailerConfig Mbean. To do this click the Find icon in the System MBean Browser navigator pane. From the Find list, select MBean Name, and, in the text box to the right of the list, enter
HWFMailerConfig. Click the Find arrow.The corresponding information appears in the right pane.
-
Select the Operations page. To set a test address:
-
In the Operations page, select addTestNotificationAddress. The Operation: addTestNotificationAddress page appears.
-
In the Parameters table, in the Channel row, in the Value column, specify the channel through which to send notifications, for example, Email, SMS, FAX, IM, Voice, Pager.
-
In the Parameters table, in the testNotificationAddress row, in the Value column, enter the address of the test recipient, for example,
[email protected]. -
Click Invoke.
-
Shut down and restart the SOA server in order for the change to take effect.
Note that in the Enterprise Manager notification management screen, the original email address is still displayed as the To address.
The test user can respond to any actionable emails. Ensure that the test email address belongs to a user in the Identity store so that it is verified as part of response email processing.
When the notification service is initialized with a test address and the recipient address is switched with the test address, a Warning is written to the log. This can be useful to identify an incorrect configuration of the test notification address.
-
22.2.1 How to Remove a Test Address
To remove a test address:
- In the Operations page, select removeTestNotificationAddress. The Operation: removeTestNotificationAddress page appears in the right pane.
- In the Parameters table, in the Channel row, in the Value column, specify the channel you want to remove for the notification, for example, Email, SMS, FAX, IM, Voice, Pager.
- Click Invoke.
22.3 Configuring Human Workflow Task Service Properties
You can assign the actionable email account name, specify workflow session timeout and custom class path URL properties values, configure dynamic assignment and task escalation functions of the assignment service, and set additional human workflow properties.
Dynamic assignment functions select a particular user, group, or application role from a group or application role, or a list of users, groups, or application roles. The selection is made according to criteria specific to the particular dynamic assignment function.
To configure human workflow task service properties:
-
Access this page through one of the following options:
From the SOA Infrastructure Menu... From the SOA Folder in the Navigator... -
Select SOA Administration > Workflow Properties > Task tab.
-
Right-click soa-infra.
-
Select SOA Administration > Workflow Properties > Task tab.
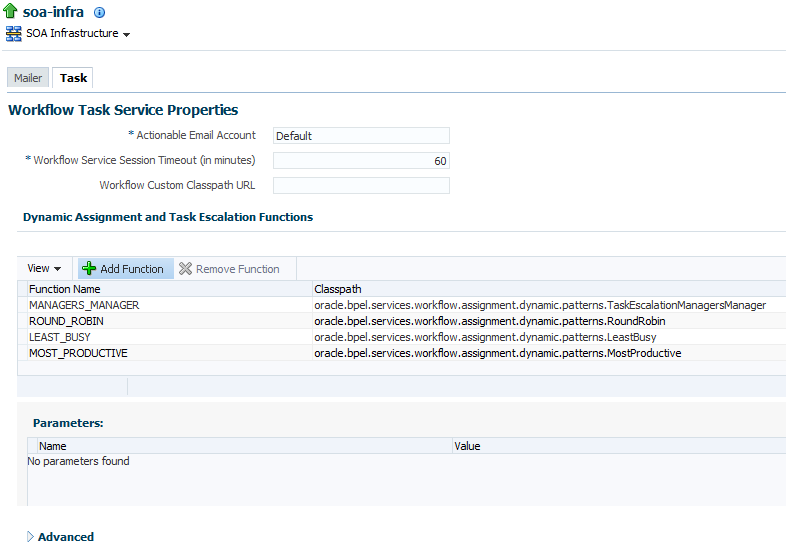
The upper part of the Workflow Task Service Properties page displays the field for the actionable email account and the pre-defined dynamic assignment functions.
-
-
Enter the following details.
Function Description Actionable Email Account
Enter the incoming, actionable email account to use.
The default account name is Default, which is the account configured in Configuring Human Workflow Notification Properties. If a different account name is specified in this field, then create and configure the account as described in Configuring Multiple Send Addresses.
Workflow Service Session Timeout (in minutes)
Enter the length of time that users logged in to Oracle BPM Worklist can remain inactive before their session expires, and they are required to log in again. This also applies to authenticated sessions created through one of the
TaskQueryServiceauthentication methods.Workflow Custom Classpath URL
Enter the URL class path. This is the class path used by workflow services to look up classes implementing custom dynamic assignment and task escalation functions, custom callbacks, and customized instances of the system resource bundle,
WorkflowLabels.properties.This can be any valid URL (either a local file path or remote URL). The class path can specify either a directory or a JAR file. The URL must include the protocol; for a class path on the local filesystem, the file protocol must be specified, such as 'file:///example/directory/'.If the URL specifies a directory, it must include a trailing slash ('
/') character.The classpath can consist of more than one URL; each URL in the classpath can be delimited with a comma character (',').
-
Go to the Dynamic Assignment and Task Escalation Functions section.
The dynamic assignment functions are defined in the following table. You can also create your own functions and register them with the workflow service.
Function Type Description MANAGERS_MANAGER
Task escalation
This function picks the manager's manager for the task.
ROUND_ROBIN
Dynamic assignment
This function picks each user, group, or application role in turn. This function uses the initialization parameter
MAX_MAP_SIZE. This parameter specifies the maximum number of sets of users, groups, or roles for which the function can maintainROUND_ROBINcounts. The dynamic assignment function holds a list of participants in memory for each group, role (or list of users, groups or roles) on which it is asked to execute theROUND_ROBINfunction.LEAST_BUSY
Dynamic assignment
This function picks the user, group or role with the least number of tasks currently assigned to it.
MOST_PRODUCTIVE
Dynamic assignment
This function picks the user, group, or role that has completed the most tasks over a certain time period (by default, the last seven days). This function uses the initialization parameter
DEFAULT_TIME_PERIOD. This parameter specifies the length of time (in days) over which to calculate the productivity. This value can be overridden when calling theMOST_PRODUCTIVEdynamic assignment function. -
Click a function to display its parameters and values in the Parameters section.
-
Click Add to add a function. You are prompted to specify the following:
-
Function name
-
Class path
-
Function parameter name
-
Function parameter value
-
-
Click OK.
-
To update the value of a parameter in a function, select the function in the Dynamic Assignment and Task Escalation Functions table.
The parameter value is displayed for editing.
-
Update the value.
-
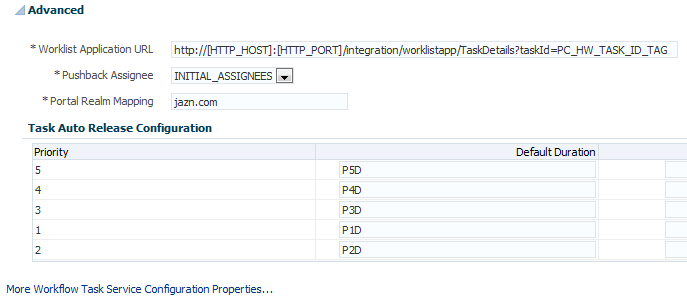
Expand the Advanced section.
The Advanced section displays the following properties:
These properties are defined in the following table.
Properties Description Worklist Application URL
In the emails that are sent for tasks, the link to Oracle BPM Worklist is read from this property.
This element identifies the URL. Configuring this is useful if the custom Oracle BPM Worklist is built. The tag
PC_HW_TASK_ID_TAGin this URL is replaced with the task ID when constructing the URL for the email.Pushback Assignee
A task can be pushed back to the previous approver or previous initial assignees. The original assignees may not be the approver because they may have reassigned the task, escalated the task, and so on. The possible values for this element are INITIAL_ASSIGNEES and APPROVER.
Portal Realm Mapping
This property is used when authenticating a user from an HTTP servlet request through the task query service method
createContext(for example, when Oracle BPM Worklist runs in a single sign-on (SSO) environment). The HTTP servlet request does not carry information about the identity service realm to which the remote user belongs; this parameter is used to configure which realm to use to authenticate the user in an HTTP servlet request remote user.Note: This property is no longer used and therefore, must not be altered.
Task Auto Release Configuration
When a task is assigned to a group, application role, or multiple users, a user must first acquire the task before working on it. After the task is acquired, other users cannot work on the task. If a user acquires a task, but does not act on it, the task is eventually automatically released, allowing other users to acquire the task. This prevents a user from acquiring tasks, then forgetting to work on them. This prevents others from working on them. Task automatic release enables you to configure the time period that elapses after a user acquires a task and before the system automatically releases the task and makes it available again to other users. The automatic release durations can be configured as a default duration and as a percentage of the expiration duration of a given task. The automatic release durations can also be configured differently for tasks of different priority.
For example, assume the task automatic release duration for priority 2 tasks is set to 50%, with a default duration of 12 hours. If a priority 2 task is set to expire in two days, the task is automatically released after one day (which is 50% of the expiration duration). If no expiration date is set for the task, then the task is automatically released after 12 hours (which is the default automatic release duration).
-
Make changes appropriate to your environment.
-
Click Apply.
-
To configure advanced task service properties in the System MBean Browser, click More Workflow Taskservice Configuration Properties. See Step 12 of Configuring Human Workflow Notification Properties for a list of some advanced properties that are displayed.
-
Make changes appropriate to your environment.
For more information about the task service and assignment service, see Developing SOA Applications with Oracle SOA Suite.
22.4 Configuring Oracle HTTP Server for Task Form Attachments
When adding an attachment to the task form through Oracle HTTP Server (OHS), include the location, /ADFAttachmenthelper, in the OHS configuration.
For example, add the following to the mod_wl_ohs.config file of OHS, under instance_home/config/OHS/ohs_instance:
<Location /ADFAttachmentHelper>
       SetHandler weblogic-handler
       PathTrim /weblogic
        ErrorPage  http:/WEBLOGIC_HOME:WEBLOGIC_PORT/
</Location>
22.5 Configuring Oracle Advanced Queuing for Oracle Human Workflow Notifications
Understand how to configure Oracle Advanced Queuing for Oracle Human Workflow Notifications.
To configure Oracle Advanced Queuing for Oracle Human Workflow notifications, set the managed bean property UseAQ under the HWFMailer configuration in Oracle Enterprise Manager Fusion Middleware Control to TRUE. Restart the SOA server.
After the server restarts, new notification messages are enqueued onto Oracle Advanced Queuing. Pending messages in the JMS queue are enqueued onto Oracle Advanced Queuing by the notification retry thread.
22.6 Configuring the Pluggable Notification Service
You can plug in and use custom notification service implementations instead of the default notification service providers.
You can plug in a custom notification service for all channels or selectively for specific channels. For example, the notification service provides the ability to plug in an existing SMS implementation instead of the default SMS notification service.
22.6.1 Pluggable Notification Service Implementation
To plug in a notification service, perform one of the following tasks:
-
Implement interface
oracle.bpel.services.notification.ICustomNotificationService -
Extend the abstract class
oracle.bpel.services.notification.AbstractCustomNotificationServiceImpl.
This interface has methods for the following channels:
-
Email
-
Voice
-
SMS
-
IM
The plugged-in notification service can override the default providers for one or more channels. When the custom notification service is overriding the default implementation for a subset of channels, the methods corresponding to the other channels (channels that are not overridden) are not called by the notification service. Those methods can just return a null value. Alternatively, the implementation can extend the following abstract class:
oracle.bpel.services.notification.AbstractCustomNotificationServiceImpl
This class provides empty implementations for each of the channels. In that case, the implementation can just extend the methods for the appropriate channels.
The implementation and its dependent classes must be available in the class path of Oracle WebLogic Server.
22.7 Globally Disabling the Automatic Release Timers for Oracle BPM Worklist Tasks
If automatic release timers are enabled for all Oracle BPM Worklist tasks and this is creating overhead for the database and JVM, you can globally disable the timers.
To globally disable the automatic release timers for Oracle BPM Worklist tasks:
22.8 Configuring the Number of Email Notification Messages
You can control the number of email notification messages that can be processed during notification retry cycles with the System MBean Browser RetryNotificationMessageThrottle property. This property prevents the overloading of messages in the queue and reduces the memory size of the notification message payload.
To configure the number of email notification messages:
-
Access this page through one of the following options:
From the SOA Infrastructure Menu... From the SOA Folder in the Navigator... -
Select SOA Administration > Workflow Properties
-
Right-click soa-infra.
-
Select SOA Administration > Workflow Properties
-
-
Click More Workflow Notification Configuration Properties.
-
Click RetryNotificationMessageThrottle.
-
In the Value field, enter a value. The default is
200000messages. -
Click Apply.
22.9 Configuring Multiple Send Addresses
It may be necessary in some processes to distinguish email notification based on the from address of the email. For example, a human resources BPEL process sends emails with the from address set as [email protected], while a finance BPEL process sends emails with the from address set as [email protected].
To configure multiple send addresses:
22.10 Configuring Notification Retries
Oracle SOA Suite provides support for reliable notifications.
The outbound notification creates a notification message with a unique notification ID and stores the message and unique ID in the dehydration store. It then enqueues this unique ID in the JMS queue and commits the transaction.
A message-driven bean (MDB) listening on this queue dequeues the message and sends a notification to the user. If there is any notification failure, the notification retries three times. If the retries all fail, it marks this notification as being in error.
22.11 Configuring the Identity Service
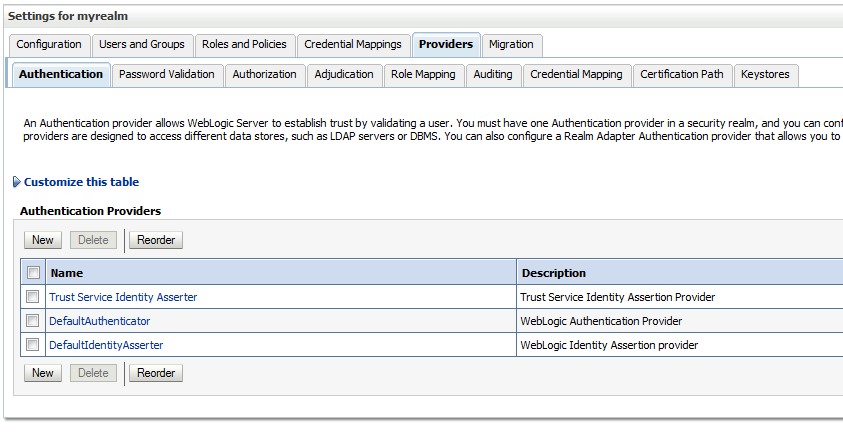
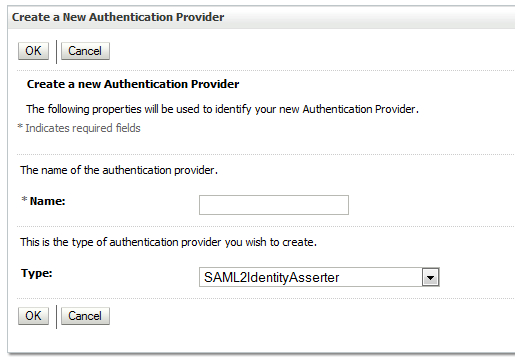
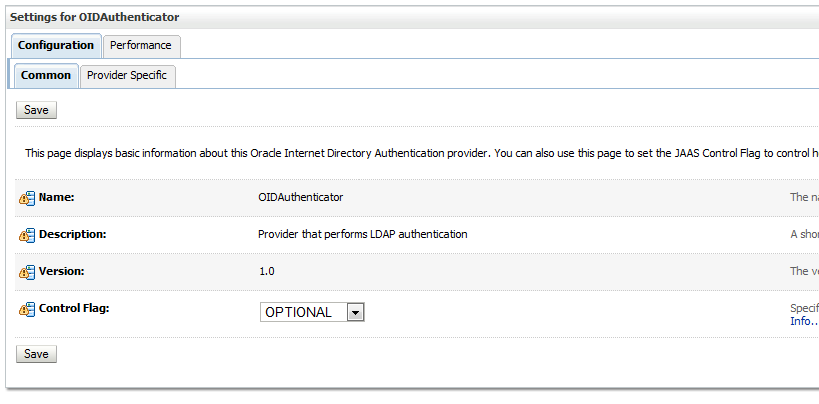
By default, the identity service uses the embedded LDAP server in Oracle WebLogic Server as the default authentication provider. You can, however, configure Oracle WebLogic to use an alternative authentication provider, such as Oracle Internet Directory, Microsoft Active Directory, or Oracle iPlanet, along with the default authenticator.
Note:
For more information on configuring and using Oracle Virtual Directory plug-ins, see Oracle Fusion Middleware Administrator's Guide for Oracle Virtual Directory, "Understanding Oracle Virtual Directory Plug-Ins".
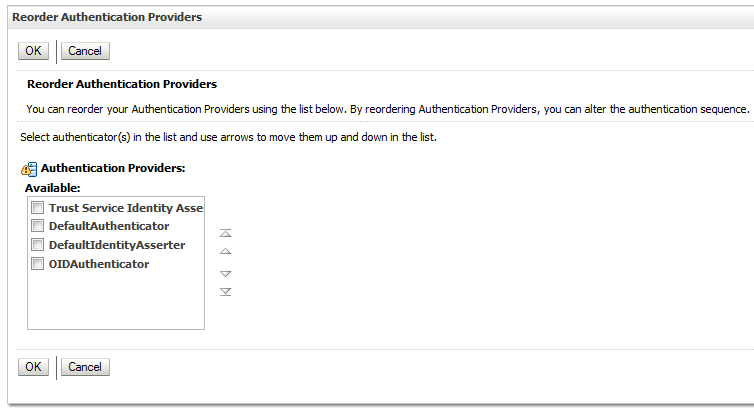
Learn how to add an authentication provider and create users and groups in the authentication provider using either Oracle WebLogic Administration Console or Oracle Directory Services Manager.
For more information on configuring multiple LDAP authentication providers, see Securing Applications with Oracle Platform Security Services, "Configuring the Identity Store Service"
For information about installing and using the organizational hierarchy of users and groups known as the demo user community, see Installing the Demo User Community in the Database.
Note:
Oracle Fusion Middleware supports providers that enable the User and Role API to interact with custom identity stores.
For more information, see Chapter "Developing with the User and Role API" of the Securing Applications with Oracle Platform Security Services.
22.11.1 Adding an Authentication Provider
You can add an authentication provider to a security realm using the Oracle WebLogic Server Administration Console.
To add an authentication provider:
22.11.1.1 Updating the User Attribute
You can modify the settings of the authentication provider in Oracle WebLogic Server Administration Console to use your email address as your login user (user attribute). You must perform the following steps:
22.11.1.2 Configuring Multiple Authentication Providers
Starting with 11.1.1.4, you can authorize users and groups from multiple authenticators. Add the following property to the idstore instance in the $DOMAIN_HOME/config/fmwconfig/jps-config.xml file:
<serviceInstance name="idstore.ldap"
  provider="idstore.ldap.provider">
   ............................
   <property name="virtualize" value="true"/>
   ..............................
</serviceInstance>
22.11.2 Creating Users and Groups in the Authentication Provider
You can create users and groups in the authentication provider using either Oracle WebLogic Server Administration Console or Oracle Directory Services Manager.
22.11.2.1 Creating Users Using WebLogic Console
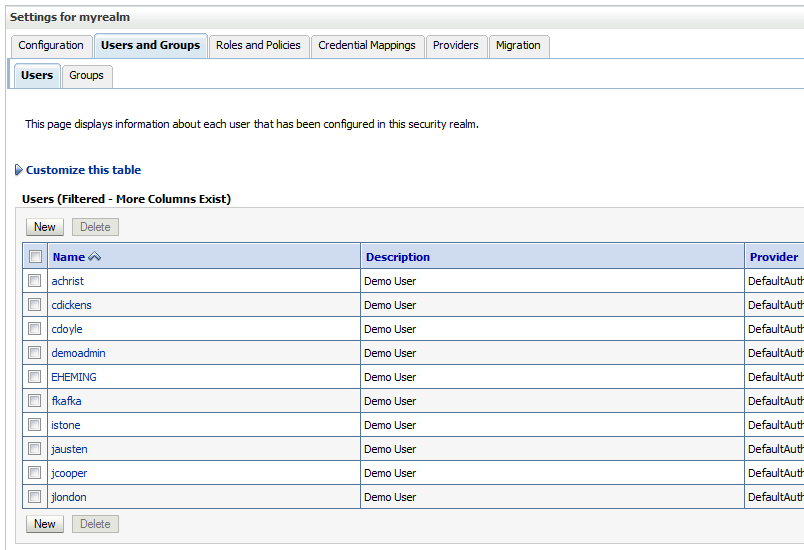
You can create users for a specific provider, and define user membership, using the Oracle WebLogic Server Administration Console.
To create a user using WebLogic Console:
22.11.2.2 Creating Groups Using WebLogic Console
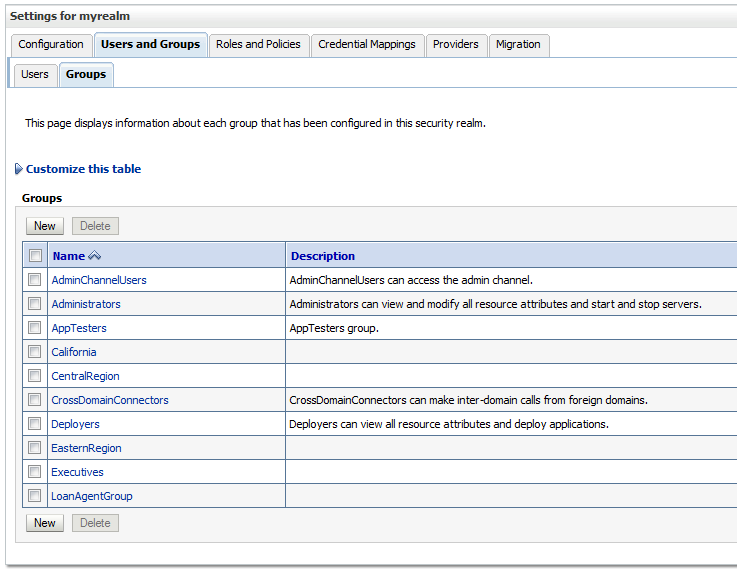
You can create groups for a specific provider, and define group membership, using the Oracle WebLogic Server Administration Console.
To create a group using WebLogic Console:
22.11.3 Configuring the Directory Service
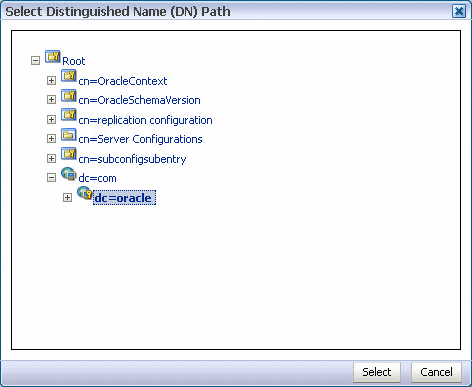
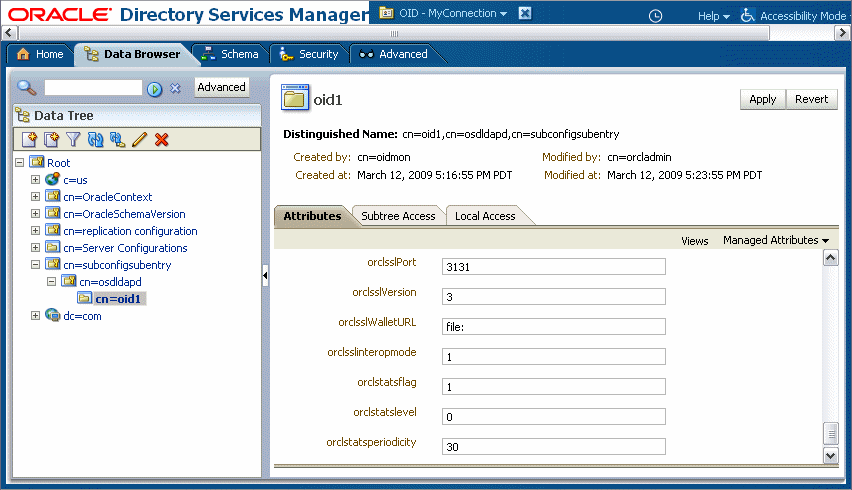
When using Oracle Internet Directory as the authentication provider, you must set the orclsslinteropmode attribute to 0 (zero) using Oracle Directory Services Manager.
Note:
If the GUID attribute in the LDAP server is set to a binary value, which cannot be properly handled in the identity service, you must map it to a unique attribute that exists in both the user and group object classes and cannot have a binary value. For example, if the cn attribute is unique, it can be used because it satisfies both of these requirements.
You map GUID to cn in the jps-config.xml file:
<property value="GUID=cn" name="PROPERTY_ATTRIBUTE_MAPPING"/>
For more information about identity store attribute mapping, see Chapter "Developing with the User and Role API" of the Securing Applications with Oracle Platform Security Services.
To configure the directory service:
22.11.4 Customizing the Identity Provider
To customize the identity provider (for example, to handle user and role information stored in home grown solutions), visit the following URL:
http://www.oracle.com/technetwork/middleware/id-mgmt/overview/index.html
22.12 Seeding Users, Groups, and Application Roles using LDAP Tools
Get an overview of the procedures required for seeding users, groups, and application roles with LDAP tools.
When you create a task, you assign humans to participate in and act upon the task. Participants can perform actions upon tasks during runtime from Oracle BPM Worklist, such as approving a vacation request, rejecting a purchase order, providing feedback on a help desk request, or some other action. There are three types of participants:
-
Users
-
Groups
-
Application roles
For more information, see Developing SOA Applications with Oracle SOA Suite.
22.12.1 Changing the Default Password in the Embedded LDAP Server
The password credential is accessible from the Oracle WebLogic Server Administration Console by selecting Security > Embedded LDAP for your domain.
For instructions on changing the default password credential, see Chapter 9, "Managing the Embedded LDAP Server" of Administering Security for Oracle WebLogic Server.
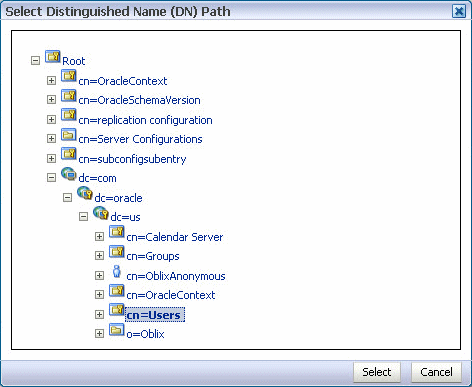
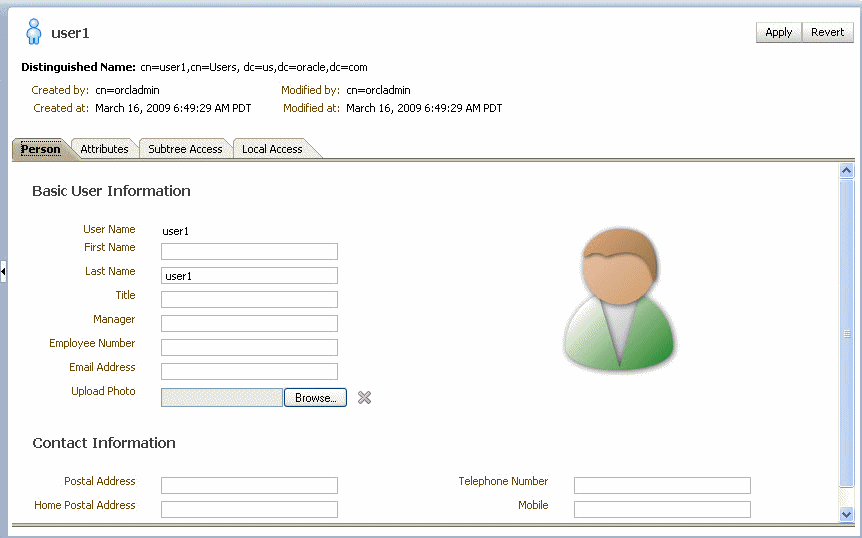
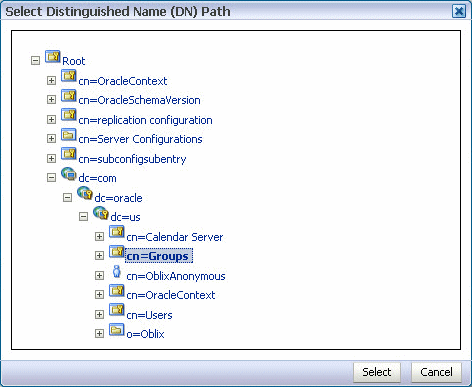
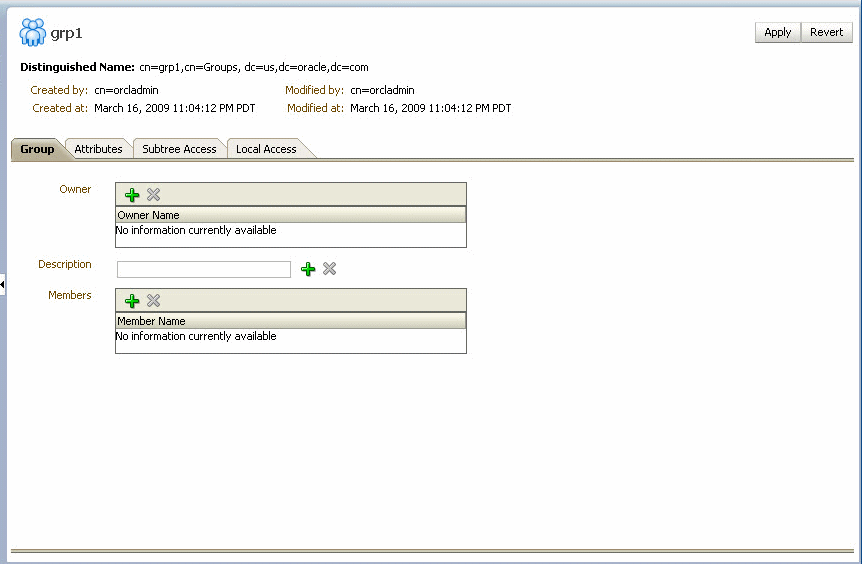
22.12.2 Seeding Users or Groups through the LDAP Browser
To seed users or groups through the LDAP browser:
-
Start an LDAP browser (for example, openLdap browser, ldapbrowser, jXplorer, and so on). See the documentation for your browser for instructions.
-
Connect to the LDAP server by providing the hostname, port number on which the server is running, and the administration user credentials with which to log in.
For Embedded LDAP
-
The default managed server port number is
7001. -
The administration credential username is
cn=admin. -
The administration credential password is what you set in Changing the Default Password in the Embedded LDAP Server.
For OIDm
-
The default port number is
3060. -
The administration username is
cn=orcladmin. -
The administration password is the password for the LDAP server.
-
-
Seed a user or group through the browser by performing the following steps:
-
Select a parent under which to add a user or group.
-
Select the Edit menu and choose an appropriate option to add a new entry.
-
Enter all required attribute values for the entry.
-
-
Seed users or groups through the LDIF file by performing the following steps:
-
Select the domain under which to seed the users or groups.
-
Select the LDIF menu and choose to import an LDIF file.
-
In the Import LDIF File dialog, browse for and select the LDIF file and click Import.
Similarly, the users or groups seeded on the LDAP server can be exported to an LDIF file by selecting the Export option from the LDIF menu.
-
-
Add attributes to the users or groups by performing the following steps:
-
Select an entry for which to add a new attribute.
-
Right-click and choose the option to add a new attribute.
-
In the Add Attribute dialog, provide the name and value of the attribute.
You can only add attributes that are defined in the LDAP server schema.
-
-
Delete attributes for users or groups by performing the following steps:
-
Select an entry for which to delete a new attribute.
-
Select an attribute from the list of attributes and delete it.
-
22.12.3 Seeding Application Roles using WLST Scripts
For instructions on using the WebLogic Scripting Tool (WLST) to seed application roles, see Chapter 4, "Infrastructure Security Custom WLST Commands" of WLST Command Reference for WebLogic Server.
22.12.4 Managing Application Roles in Oracle Enterprise Manager Fusion Middleware Control
This section describes how to manage application roles in Oracle Enterprise Manager Fusion Middleware Control.
Note:
Follow these steps to provide nonadministrators with access to Oracle SOA Composer. This is accomplished by assigning the SOADesigner role to users or groups on the Edit Application Role page. The users must exist in the Oracle WebLogic Server realm.
To manage application roles in Oracle Enterprise Manager Fusion Middleware Control:
-
In the navigator, select the appropriate Oracle WebLogic Server under WebLogic Domain > Farm_Domain_name.
-
Right-click the domain name, and select Security > Application Roles.
-
Create an application role by performing the following steps:
-
In the Application list, select the application name (server_name/soa-infra) under which to create a role.
-
Select the Create option in the Application Roles page.
The Create Application Role page appears.
-
Enter the role name, display name, and description for the application role.
-
Add members by selecting Add Role in the Roles section and Add User in the Users section.
-
Click OK to create the application role.
-
-
Edit application roles by performing the following steps:
-
In the Select Application Name to Search list of the Search section of the Application Roles page, select an appropriate application (for example, soa_server1/soa-infra).
-
To the right of the Role Name list, click the Search icon.
This action lists all the application roles created for that application.
-
Select the application role to edit (for example, select SOADesigner).
-
Click Edit.
The Edit Application Role page appears.
-
Add application roles and groups in the Roles section and users in the Users section (for example, assign SOADesigner to a user to which to provide access to Oracle SOA Composer). The user must be defined in the Oracle WebLogic Server realm.
-
Click OK.
-
-
Delete application roles by performing the following steps:
-
In the Select Application Name to Search list of the Search section of the Application Roles page, select an appropriate application.
-
To the right of the Role Name list, click the Search icon.
This action lists all the application roles created for that application.
-
Select the application role to delete.
-
Click the Delete button to delete the application role.
-
Click Yes in the Confirmation dialog.
-
22.13 Enabling Case Agnostic Group Names in Human Tasks
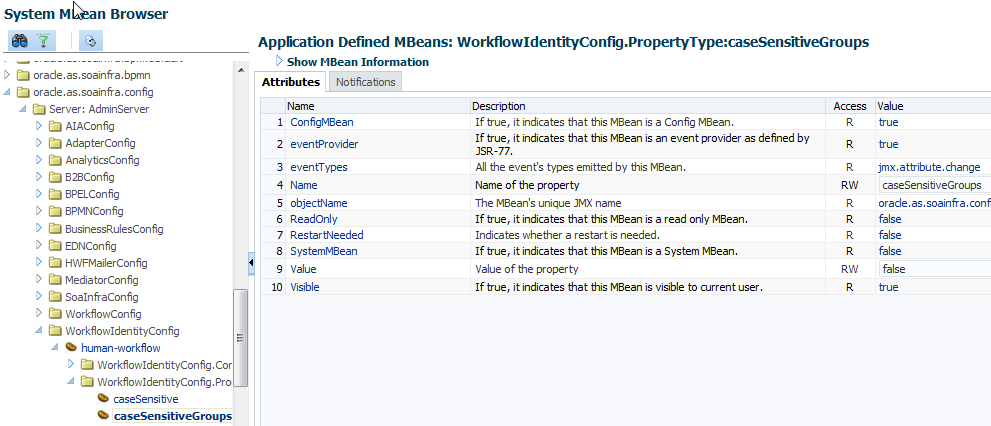
By default, only user names in human tasks are case agnostic (case insensitive). This behavior is controlled by the value of the caseSensitive property in the System MBeans Browser for users, which is set to false by default. Group names in human tasks must be identical to what is seeded in the user directory. However, if you also want group names in human tasks to be case agnostic, you must set the caseSensitiveGroups property to false.
To enable case agnostic behavior for group names in human tasks:
22.14 Configuring Security Policies for Human Workflow Web Services
A policy set, which can contain multiple policy references, enables you to attach policies globally to a range of endpoints of the same type.
Attaching policies globally using policy sets enables you to ensure that all subjects are secured in situations in which multiple users, such as a developer, assembler, or deployer, did not explicitly specify the policies to attach. Policies that are attached using a policy set are considered externally attached.
For example, if the developer did not specify policies in annotations or include policy references in deployment descriptors, then the deployer must attach them or risk a potential security risk. By attaching policies globally to a set of subjects by type, the administrator can ensure that all subjects are secured by default independent of, and even before, deployment. For example, the administrator can define a policy set that attaches a security policy to all web service endpoints in a domain. In this case, any new services added to the domain automatically inherit the security configuration defined in the policy set.
For more information about attaching policies globally using policy sets, see Administering Web Services.
